Friday, October 10, 2025

Ads Setup Custom Code To Set Manual Ads In Blog Post


This post is about increasing AdSense CPC, CTR, and especially AdSense revenue or earnings In 2025.

How to Set Up Manual Ads in Blog Posts: A Complete Guide for 2025

In 2025, bloggers and website owners can optimize their monetization strategies by using manual ad placements. By controlling where ads appear, you can increase your Click-Through Rate (CTR) and Cost Per Click (CPC). This guide explains how to set up manual ads effectively and how to create responsive ads for both desktop and mobile users.

Why Use Manual Ad Placement?

Manual ad placement offers several advantages:

  • Better Control: You decide where ads appear in your content.
  • Optimized for Devices: Show desktop ads to desktop users and mobile ads to mobile users.
  • Improved User Experience: Ads can be placed in non-intrusive ways, enhancing user interaction.
  • Increased Revenue: Strategic ad placement can boost CTR and CPC.

Step-by-Step Guide to Manual Ad Setup

1. HTML Structure for Ad Placement

Start by defining areas in your HTML for desktop and mobile ads. This helps you target different users with different ads.

<div class="desktop-ad">
    <!-- Place your desktop ad code here -->
</div>
<div class="mobile-ad">
    <!-- Place your mobile ad code here -->
</div>

2. CSS for Responsive Design

To make ads responsive, use CSS to display ads based on device screen size. The code below ensures desktop users see one ad, and mobile users see another.

.desktop-ad {
    display: block;
}
.mobile-ad {
    display: none;
}

@media (max-width: 768px) {
    .desktop-ad {
        display: none;
    }
    .mobile-ad {
        display: block;
    }
}

3. Section Targeting for Ad Relevance

Google’s section targeting ensures ads are served within relevant content sections. Add this code around sections of your content where you want the ads to appear.

<!-- google_ad_section_start -->
<!-- google_ad_section_end -->

Best Practices for Manual Ad Placement

To make your ad setup more effective, follow these practices:

  1. Strategic Placement: Position ads at points where they are likely to be noticed, such as after the first paragraph or between sections.
  2. Avoid Disruption: Ensure ads do not interfere with content readability.
  3. Experiment: Try different placements to see which one works best for your audience.
  4. Monitor Performance: Use AdSense reports to track your CTR, CPC, and other metrics. Adjust placement if necessary.

Monitor and Optimize Ad Performance

After setting up your ads, track the following metrics to understand their performance:

  • CTR (Click-Through Rate): This shows how often users click on your ads.
  • CPC (Cost Per Click): This tells you how much you earn per click on the ads.
  • RPM (Revenue Per Mille): This metric indicates the revenue per 1,000 impressions.

Using these metrics, you can determine whether the manual ad placement strategy is working for you and make adjustments as needed.

Sunday, September 1, 2024

How to Make the Table of Contents Collapsible in Rank Math SEO Plugin

 In this tutorial, we'll demonstrate how to collapse the Table of Contents (TOC) in the Rank Math SEO plugin using a combination of JavaScript and CSS. This will enhance the user experience by allowing visitors to toggle the visibility of the TOC content.

Steps to Collapse the Table of Contents in Rank Math

The Rank Math TOC block is displayed by default, but you can make it collapsible with a few simple steps. Follow these instructions to achieve a collapsible TOC block.

Step 1: Add JavaScript Code

To make the TOC block collapsible, add the following JavaScript code to your site. You can do this by using a Code Snippet plugin or by adding it directly to your theme’s functions.php file.


function turn_rm_toc_collapsable() { ?> <script> document.addEventListener("DOMContentLoaded", function() { var tocItems = document.querySelectorAll("div.wp-block-rank-math-toc-block"); tocItems.forEach(function(tocItem) { tocItem.addEventListener("click", function(event) { var nav = tocItem.querySelector("nav"); if (nav.style.overflow === "hidden" || nav.style.overflow === "") { nav.style.overflow = "visible"; nav.style.maxHeight = "100vh"; } else { nav.style.overflow = "hidden"; nav.style.maxHeight = "0"; } }); }); }); </script> <?php } add_action('wp_footer', 'turn_rm_toc_collapsable');

This JavaScript code enables the TOC block to toggle between expanded and collapsed states by adjusting the overflow and maxHeight properties of the nav element within the TOC block.

Step 2: Style the TOC Block

Next, enhance the appearance of the TOC block with CSS. Add the following CSS code to your theme’s style.css file or use a custom CSS plugin:

.wp-block-rank-math-toc-block { position: relative; } .wp-block-rank-math-toc-block h2 { background: #f1f2f6; padding: 10px 12px 10px 18px; cursor: pointer; font-size: 18px !important; font-weight: normal !important; position: relative; margin-bottom: 0; } .wp-block-rank-math-toc-block h2:before { display: inline-block; content: ""; width: 0; height: 0; border-style: solid; border-width: 6px 0 6px 12px; border-color: transparent transparent transparent #000000; margin-right: 8px; } .wp-block-rank-math-toc-block nav { padding: 10px 10px 0px 10px; max-height: 0; overflow: hidden; transition: max-height 0.3s ease, overflow 0.3s ease; }

This CSS code styles the TOC block, including the heading to make it clickable, adjusts padding, and adds a transition effect for a smooth animation when toggling the visibility of the TOC content.

Frequently Asked Questions

1. How do I collapse the Rank Math TOC block by default?

To hide the Rank Math TOC block by default, include the provided CSS in your theme’s style.css file or a custom CSS plugin. This will initially hide the TOC content, and users can click the heading to expand it.

2. Can I further customize the appearance of the TOC block?

Yes, you can modify the CSS styles to adjust colors, font sizes, spacing, and other visual elements to better match your website’s design.

Conclusion

By following these steps, you can easily make the Rank Math TOC block collapsible and style it to fit your site’s aesthetics. This approach improves user experience by decluttering your content pages.

If you have any questions or need additional assistance, please leave a comment below.

Sunday, June 16, 2024

Mastering Color Theory in Web Design

A Brief Look Into Color History

Color has been an important part of human history and culture for centuries. From ancient civilizations to modern times, color has been used to express emotions, convey messages, and create visual impact. 

In ancient Egypt, for example, certain colors were associated with specific gods and had symbolic meanings. In the Middle Ages, color pigments were highly valued and used to create intricate illuminated manuscripts. The invention of synthetic colors in the 19th century revolutionized the world of art and design, allowing for a wider range of vibrant and long-lasting colors.

Understanding the historical significance of color can provide designers with a deeper appreciation for its role in web design and inspire them to explore new color palettes and combinations.

What is Color Theory in Website Design?

Color theory is the study of how colors interact with each other and how they can be used to create specific effects. It encompasses concepts such as color harmony, color psychology, and color symbolism.

One fundamental concept in color theory is the color wheel, which consists of primary, secondary, and tertiary colors. Primary colors, including red, blue, and yellow, cannot be created by mixing other colors and are used as the foundation for all other colors. Secondary colors, such as orange, green, and purple, are created by mixing two primary colors. Tertiary colors, like red-orange or yellow-green, are created by mixing a primary color with a secondary color.

By understanding the color wheel and color relationships, designers can create visually balanced and aesthetically pleasing color palettes.

Understanding Color Psychology

Color psychology explores the psychological and emotional effects of different colors. Colors can evoke specific emotions and influence how people perceive and interact with a website.

For example, red is often associated with passion and excitement, while blue is associated with trust and reliability. Yellow can evoke feelings of happiness and optimism, while green is often associated with nature and tranquility.

Understanding the psychological impact of colors can help designers create websites that effectively communicate the desired message and evoke the intended emotional response. It’s important to note that color psychology can vary across different cultures and individuals, so designers should consider the target audience and cultural context when using colors in web design.

Creating Visual Hierarchy with Color

Color can be used to create visual hierarchy and guide users’ attention to important elements on a webpage. By using contrasting colors, designers can make certain elements stand out and draw the user’s eye.

For example, using a bold and vibrant color for a call-to-action button can make it more noticeable and encourage users to take action. On the other hand, using a muted color for less important elements can help maintain visual balance and prevent overwhelming the user.

In addition to color, other design principles such as size, typography, and spacing also contribute to creating an effective visual hierarchy. By combining these elements strategically, designers can guide users through the content and improve the overall user experience.

The Fundamentals of Color Theory

Color theory is the study of how colors interact with each other and how they can be used to create specific effects. It encompasses concepts such as color harmony, color psychology, and color symbolism.

One fundamental concept in color theory is the color wheel, which consists of primary, secondary, and tertiary colors. Primary colors, including red, blue, and yellow, cannot be created by mixing other colors and are used as the foundation for all other colors. Secondary colors, such as orange, green, and purple, are created by mixing two primary colors. Tertiary colors, like red-orange or yellow-green, are created by mixing a primary color with a secondary color.

By understanding the color wheel and color relationships, designers can create visually balanced and aesthetically pleasing color palettes.

Choosing the Right Color Palette

Choosing the right color palette is essential for creating a visually appealing and cohesive web design. A well-chosen color palette can evoke specific emotions, convey the brand’s personality, and improve user experience.

When selecting a color palette, designers should consider factors such as the brand’s identity, target audience, and the intended mood or atmosphere of the website. Warm colors like red and orange can create a sense of energy and excitement, while cool colors like blue and green can evoke calmness and tranquility. Neutral colors like gray and beige can provide a sense of simplicity and elegance.

It’s also important to consider color contrast and accessibility when choosing a color palette. High contrast between text and background colors ensures readability, especially for users with visual impairments. Using color contrast tools and considering accessibility guidelines can help designers create inclusive and user-friendly websites.

Color Wheel

The color wheel is a visual representation of how colors relate to each other. It consists of primary, secondary, and tertiary colors arranged in a circular format. The color wheel helps designers understand color relationships and create harmonious color schemes.

By using colors that are adjacent to each other on the color wheel, designers can create a sense of unity and harmony. On the other hand, using colors that are opposite each other on the color wheel can create a strong contrast and add visual interest to a design. Exploring the color wheel and experimenting with different color combinations can help designers create unique and visually appealing web designs.

Color Relationships

Color relationships play a crucial role in web design. Understanding how different colors interact with each other can help create harmonious and visually appealing websites. By considering color relationships, designers can choose colors that complement each other and create a cohesive design.

One important color relationship is complementary colors, which are opposite each other on the color wheel. These colors create a strong contrast and can be used to draw attention to specific elements on a webpage. Analogous colors, on the other hand, are adjacent to each other on the color wheel and create a more subtle and harmonious effect. Exploring different color relationships and experimenting with various combinations can help designers create unique and eye-catching web designs.

Optimizing Color Contrast for Accessibility

Optimizing color contrast is crucial for ensuring that a website is accessible to all users, including those with visual impairments or color blindness. A high level of color contrast between text and background colors improves readability and usability.

Designers should consider using dark text on a light background or light text on a dark background to ensure sufficient contrast. There are various color contrast tools available that can help designers evaluate and adjust the color contrast of their designs. Following accessibility guidelines and considering the needs of all users can result in a more inclusive and user-friendly web design.

Tuesday, March 5, 2024

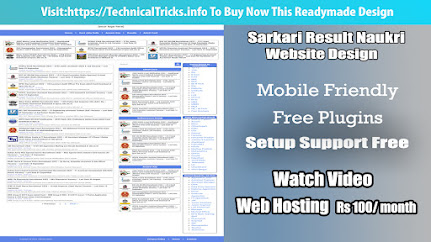
Sarkari Result WordPress Theme At Low Price || Sarkari Result Jaisi website kaise banaye

 Sarkari Result WordPress Theme At Low Price


Download SarkariResult WordPress Theme & Plugins

Sarkari Result WordPress Theme At Low Price || Sarkari Result Jaisi website kaise banaye
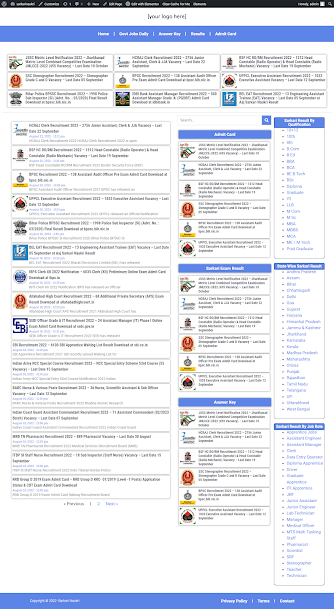
home page

Elementor Pro Plugin Version Free Download

Elementor Pro Free Download 2023, We have shared Elementor Pro plugin for free download to everyone. 

Is Elementor plugin free? Is Elementor free? Elementor offers a free plan as well as multiple paid subscription plans. The free version comes with all the features you need to create a strong user experience on your site, including a drag-and-drop editor, 40+ basic widgets, and 30+ templates


  1. Responsive design
  2. Lightweight and clean codes
  3. Recommended for Client projects
  4. Fast loading speed
  5. Focused on performance
  6. Highly secure and stable
  7. No render-blocking issues
  8. Optimized for search engine bots
  9. Schema markup
  10. 25+ ready to use site library
  11. 60+ color options
  12. Beautiful typography options
  13. WooCommerce support
  14. Sticky navigation menu
  15. Padding and margin settings option
  16. Infinite scroll
  17. Featured image support with custom settings
  18. Secondary navigation menu support
  19. Its Own small page builder
  20. Six layout options
  21. many more…


GP Premium v2.3.1 - Plugin Free Download 


Contact Me any Problem 


Elementor Template Download  

Rs.2999 Rs.499.00


Sarkari Results Website WordPress Theme

We have provided all the important themes, plugins and templates required to make the Sarkari Result Website in our bundle. Download and luxuriate in blogging.


Sarkari Result WordPress Theme Contains –

  1. One-click demo import to theme
  2. Sarkari results in themes to create the Sarkari results website
  3. Essential complements to create the Sarkari results website
  4. Add-on to share on social networks
  5. Top 8 Box CSS Code and templates designed by elements
  6. Last work section template
  7. Admission Card Section Template
  8. Results section template
  9. Teaching and banking work section template
  10. Study Program Section
  11. Custom results, admit card and results page template
  12. Jobs by state or workforce by category
  13. HTML code in higher motion
  14. All temperatures have been used on the aajsarkariresult website
  15. All templates associated with the aajsarkariresult website
  16. JavaScript code to open all links in a new tab
  17. Customizer settings Import JSON file
  18. Sarkari Result WordPress

FEATURES

  1. Clean Files & Free From Virus
  2. Product Last Updated: 29.06.2022
  3. Free New Version
  4. Responsive
  5. Mobile Friendly
  6. Custom 404 Page
  7. Fast Loading
  8. Minimal
  9. Job Portal
  10. Online Job
  11. Job
  12. Job Search Engine
  13. Technology
  14. Multicolor
  15. Simple
  16. Portfolio
  17. Whatsapp Sharing
  18. Seo Friendly
  19. Clean Layout
  20. Clear Design
  21. Drop Down Menu
  22. Social Sharing
  23. HTML5 & CSS3
  24. Browser Compatibility


Sarkari Result 2021 – Frequently Asked Questions

Q1. What is the Sarkari result page?

Sarkari ends in which includes all the latest Sarkari results related to banking, rail, navy, police, PSC and other Sarkari jobs. Candidates can also check the admit cards of various examinations on our page. Get results and support the card link directly from our Sarkari Results page.

Q2 How to verify Sarkari result notification?

The Sakri result will be updated immediately for many exams . Candidates can visit our website http://aajsarkariresult.com/ and click on the Sarkari result. A list of active results will be available for many companies and click on the result you want to see.

Q3. What is the knowledge available on the Sarkari results page?


The Sarkari result page contains all the latest Sarkari result notifications, state-level Sarkari result notification, most recent/upcoming Sarkari result updates, most recent/upcoming Sarkari admission card updates and more.

Q4. What will you know from the Sarkari results page?


Candidates can check the results of small businesses for the best business from our Sarkari results page. Apart from this, candidates can get the latest / upcoming updates related to the admit card, interview date, etc. On the Sarkari Results page. The knowledge that you will see on our results page of Sarkari is that the result of each stage of the examination, the final result, the result of the Sarkari so far published, the name next to the publication name and the link related to the result of the Sarkari.

Q 5. Does Sarkari result page contain state exam results?


All the latest Sarkari Result will be updated immediately on our page. Candidates who are having difficulty in seeing the exact Sarkari result can visit . Click on the current status and download your exam results.

------------------------------------------------------------------------------------------------ 👉 Download Link 🔗https://www.google.com/search?q=https%3A%2F%2Ftechnical-tricks-latest.blogspot.com% ------------------------------------------------------------------------------------------------ 👇👇 [ I Am Use For Web Hosting ] 👇👇 💥 Web Hosting Link 👉🏻https://onohosting.com/core/aff.php?aff=1167 💥 GoDaddy Link 👉🏻 https://inr.deals/RrfFog ------------------------------------------------------------------------------------------------ 👇👇[My Personal PC Specs ] 👇👇 💥 Ryzen 3 3200G 👉🏻https://amzn.urlvia.com/erHUf3 💥 Acer 21.5 inch LED 👉🏻https://amzn.urlvia.com/8F6NAj 💥Antec Atom V550 Watts 👉🏻https://amzn.to/2VMamYR 💥 WD Green 480 GB 👉🏻https://amzn.urlvia.com/7r1GYz 💥 Seagate BarraCuda 1TB 👉🏻https://amzn.urlvia.com/mOFw3Y 💥 MSI A320M-A PRO 👉🏻https://amzn.urlvia.com/bCzB85 💥 ADATA GAMMIX D30 DDR4 8GB 👉🏻https://amzn.urlvia.com/AkWDRl ------------------------------------------------------------------------------------------------ ◼️ Websites 👉🏻 https://technical-tricks-latest.blogspot.com ------------------------------------------------------------------------------------------------ ------------- Support me By (its Free) ------------------ LIKE | COMMENT | SHARE | SUBSCRIBE 👇👇 Follow us on Social media 👇👇 💬Youtube https://www.youtube.com/channel/UCyWi4yFMTZ8Ilf_4tTMjysg 💬Instagram https://www.instagram.com/technicaltrickslatest/ 💬Telegram https://t.me/AmarTechnicalTricks ------------------------------------------------------------------------------------------------ 👇👇 Our same other playlists- 👇👇 ------------------------------------------------------------------------------------------------ #technicaltricks ✮ Video Queries sarkari result website kaise banaye,how to create a website like sarkariresult.com,how to create sarkari result website,sarkari result,create sarkari result website,how to make sarkari result website,how to create sarkari result website in wordpress,create job website free,how to make website,make sarkari result website in wordpress,create sarkari result in wordpress,website like sarkari result in wordpress,sarkari result in wordpress,technical moh,how to make sarkari result website in wordpress,sarkari result wordpress theme,make sarkari result website,arun maurya,job website,wordpress website,sarkari result theme,how to create website like sarkariresult.com,sarkari job website kaise banaye,how to create website like sarkari result,create website like sakari result,sarkari result 2021,how to make website like sarkari result on wordpress,how to create job portal website in wordpress free,how to create a job board website for free,how to make website for free,how to make website on google,Elementor Pro V3.7.1 With Free 3.6.6 (Full Template Kits)

✮ Video Queries sarkari result website kaise banaye,how to create sarkari result website,sarkari result jaisi website kaise banaye,how to create website like sarkari result,sarkari result,how to make sarkari result website,how to make sarkari result website in wordpress,create sarkari result website,how to create sarkari result website in wordpress,sarkari job website kaise banaye,make sarkari result website,make sarkari result website in wordpress,how to create sarkari result website,how to create website like sarkari result,how to create sarkari result website in wordpress,sarkari result website kaise banaye,how to make sarkari result website in wordpress,sarkari result,create sarkari result website,how to make sarkari result website,website like sarkari result in wordpress,make sarkari result website,how to create website like sarkariresult.com,how to make website like sarkari result,create sarkari result in wordpress,website like sarkari result in wordpress,how to create sarkari result website in wordpress,sarkari result in wordpress,how to make sarkari result website in wordpress,sarkari result wordpress theme,how to create sarkari result website,make sarkari result website,create sarkari result website,sarkari result website kaise banaye


Friday, March 1, 2024

How to Create a Live Code Editor with HTML, CSS, and JavaScript: A Step-by-Step Guide

Create a Live Code Editor with HTML, CSS, and JavaScript | Build an Online Code Editor Similar to w3schools | 2024

Create a Live Code Editor with HTML, CSS, and JavaScript | Build an Online Code Editor Similar to w3schools | 2024


Introduction

In this tutorial, we will be creating a live web editor. This is a web application that allows you to write HTML, CSS, and JavaScript code and see the results in real time. This is a great tool for learning web development and for testing out code snippets. We will be using the iframe element to display the results. The iframe element is used to embed another document within the current HTML document. The src attribute of the iframe element specifies the URL of the document to embed.

What is a Web Editor?

A web editor is a web-based application designed for writing and editing code in languages such as HTML, CSS, and JavaScript, with the ability to instantly preview the results. Its primary functions include facilitating fast prototyping, simplifying code testing, and providing a platform for learning web development. Users can input code directly into the editor, make real-time modifications, and visualize the effects immediately, streamlining the development process. Whether for professional web development projects, quick experimentation, or educational purposes, web editors offer a user-friendly interface and essential features tailored to the needs of developers and learners alike. With the convenience of web accessibility and instantaneous feedback, web editors play a crucial role in empowering individuals to create, experiment, and refine their code with efficiency and ease

What is a Live Web Editor?

A live web editor is a web editor that displays the results of the code in real time.

Prerequisites

Before you begin this tutorial, you should have a basic understanding of HTML, CSS, and JavaScript. You should also have a basic understanding of the DOM and how to select elements using JavaScript. Finally, you should have a basic understanding of the iframe element.


Software you will need:

  • A code editor (Visual Studio Code, Sublime Text, Atom, etc.)
  • A web browser (Google Chrome, Mozilla Firefox, Microsoft Edge, etc.)
  • A browser extension for live preview (Live Server, Live Preview, etc.)
  • Github
  • Github Pages for hosting

Step 1: Create the HTML File

Create a new folder and name it "live-web-editor". Inside the folder, create a new file and name it "index.html". Open the file in your code editor and add the following code:


Above code is used for live rendering of textarea it will automatically render when you type in textarea and also is used enable tab in textarea because by default tab is not enabled in textarea.

Step 2: Create the CSS File

Create a new file and name it "styles.css". Open the file in your code editor and add the following code:


Step 3: Create the JavaScript File

Create a new file and name it "script.js". Open the file in your code editor and add the following code:


Step 4 : Running the Project

Save all the files and open the "index.html" file in your browser using the live server extension. You should see the following output:


 Advertisements

Download File


Learn how to develop a live code editor using HTML, CSS, and JavaScript. Follow this step-by-step guide to create an online code editor reminiscent of w3schools. Enhance your web development skills and empower users to write and execute code in real-time.

Live Code Editor, HTML, CSS, JavaScript, Online Code Editor, w3schools, Web Development, Real-time Code Execution, Interactive Coding Experience, Code Playground, Web Development Tutorial, Code Editor Tutorial, JavaScript Programming, CSS Styling.


Saturday, February 24, 2024

How to Use the :has() Selector in CSS 2024 technical tricks

 For most of the history of CSS, selectors have been limited to targeting elements based on their parents in the DOM tree. Consider this HTML structure:

The :has() selector is a relational pseudo-class in CSS that selects an element based on its relationship with other elements. It can be used to select an element if it contains another element that matches a given selector.


<div>

    <p>Paragraph 1</p>

<div>

<main>

    <div>

    <p>Paragraph 2</p>

    </div>

 <main>


 Applying styles to paragraph 2 in CSS is trivial, as it can be targeted by the parent <main> node.

main p {

    color: blue;

}


 This will style Paragraph 2 but not Paragraph 1, as the second paragraph is contained inside the <main> element.


What has not historically been simple however, was styling the <main> node based on the presence of the <p> tag below it.

<main>

    Don't Style This

</main>

<main>

    <p>Style This</p>

</main>


By looking upwards in the DOM tree, there was no way to apply styles to just the second <main> element and not the first (without uses classes or IDs of course).

Introducing the :has() Selector

At its core, the :has() selector is a relational pseudo-class. This means it allows you to select an element based on its relationship with other elements. Specifically, it selects an element if it contains another element that matches a given selector.

In the above example, we can now do the following:

main:has(p) {

    color: red;

}


This opens up numerous possibilities for styling your web pages more efficiently and with less code.

Example 1 – Highlighting Articles with Images

Consider a webpage that displays a list of articles, each enclosed in an <article> tag. If we want to highlight articles that contain images, the :has() selector offers a straightforward solution:

article:has(img) {

  border: 2px solid red;

}


This CSS rule applies a blue border around any <article> tag that contains an <img> element, visually distinguishing articles with images from those without.

Example 2 - Styling Navigation Menus with Sub-Menus

Here is another example. In this example, the :has() selector is being used to add a :before() pseudo element to any menu item that has sub menus – that is any <li> element that contains a child element with the class .sub-menu.

.main-menu > li:has(.sub-menu):before {
  content: "▼";
  margin-left: 5px;
  font-size: 0.75em;
}


Browser Support

As of March 2024, the :has() selector is supported by approximately 92% of web browsers globally, including all the most common modern browsers such as the latest versions of Chrome, Firefox, Safari and Edge. For unsupported browsers, consider using feature detection libraries like Modernizr to apply alternative styles.

It's also a good idea to design your CSS to degrade gracefully, ensuring that your web pages remain at least functional and visually acceptable in browsers that do not support the :has() selector.

Ready to Use Today

The :has() selector offers a new level of flexibility and power in CSS, enabling you to write cleaner, more efficient stylesheets. By selecting elements based on their content, the :has() selector simplifies many common styling challenges, from highlighting articles with images to styling responsive layouts.

As browser support continues to grow, 2024 is the perfect year to begin incorporating the :has() selector into your CSS.


Thursday, February 22, 2024

Getting the Source of a Website with Python's Requests Library 2024


The internet is a treasure trove of information, and sometimes, you might want to access the underlying HTML source code of a website for various purposes like data extraction, analysis, or automation. Python, with its rich ecosystem of libraries, makes web scraping a straightforward task.

In this article, we'll explore how to use Python to fetch the source code of a website.


1. Installing Required Libraries

To follow this article, you will need the following:


  • Python 3.6 or higher
  • The requests library

Python 3.6

Before we dive into web scraping, ensure you have Python installed on your system. You can download the latest version from python.org.


The requests library

The "Requests" library in Python is a popular and widely used library for making HTTP requests to web services, websites, and APIs. It simplifies the process of sending HTTP requests and handling HTTP responses, making it easier for developers to interact with web resources.


To install the "Requests" library in Python, you can use the Python package manager pip. Here are the steps to install Requests:


  1. Open your command prompt or terminal.
  2. Run the following command to install Requests:

pip install requests

2. Writing Python Code

Now that we have Requests installed, let's write a simple Python script to retrieve the source code of a website.

import requests

# Define the URL of the website you want to scrape
url = 'https://example.com'

# Send an HTTP GET request to the URL
response = requests.get(url)

# Check if the request was successful (status code 200)
if response.status_code == 200:
    # Print the HTML source code
    print(response.text)
else:
    print('Failed to retrieve the webpage. Status code:', response.status_code)


In this script:


  1. We import the Requests library with import requests.
  2. We define the url variable with the URL of the website we want to scrape. You can replace 'https://example.com' with the URL of your target website.
  3. We use requests.get(url) to send an HTTP GET request to the specified URL and store the response in the response variable.
  4. We check if the request was successful by examining the HTTP status code. A status code of 200 indicates success.
  5. If the request was successful, we print the HTML source code of the website using response.text.


The following example shows how to use the above code to get the source code of the Google homepage:


import requests


# Define the URL of the website you want to scrape

url = 'https://google.com'


# Send an HTTP GET request to the URL

response = requests.get(url)


# Check if the request was successful (status code 200)

if response.status_code == 200:

    # Print the HTML source code

    print(response.text)

else:

    print('Failed to retrieve the webpage. Status code:', response.status_code)


Output:

<!DOCTYPE html>

<html itemscope="" itemtype="http://schema.org/WebPage" lang="en">

<head>

  <meta content="text/html; charset=utf-8" http-equiv="Content-Type">

  <meta content="width=device-width, initial-scale=1.0" name="viewport">

  <title>Google</title>

  ...

</head>

<body>

  ...

</body>

</html>


Conclusion

Web scraping with Python's Requests library is a straightforward and effective way to access the source code of a website. However, it's essential to be aware of website terms of service and legal considerations when scraping websites. Always ensure that your web scraping activities are ethical and comply with the website's policies. With Requests, you have a powerful tool at your disposal to gather data, automate tasks, and explore the vast world of web content. Happy scraping!